In 2016, video is an important part of the content marketing mix, and it's here to stay.
Video has an uncanny ability to quickly warm up potential customers and connect them to you and your product. YouTube, the largest repository of videos, offers you the opportunity to create a dedicated audience of subscribers; and as the second largest search engine after Google, it's not to be ignored.
All that sounds very tempting, but if you don't have video experience, it can also be very intimidating.
When Magoosh, the company I work for, started making branded social video content, I was overwhelmed by the amount of conflicting recommendations out there. That feeling of information overload is what led to this guide—a quick-start "film school" for marketers.
What follows is a cheat sheet of all you need to get started making great face-to-camera videos for YouTube.
Step 1: Build your video kit
Camera
Though it's possible to create video for YouTube on your phone—and I would recommend that over entirely skipping video marketing—the best camera tools for authoritative-quality videos are Digital SLR cameras.
DSLRs are manufactured by all major camera companies; they have low-cost "prosumer" models, and they are simple enough out of the box for a beginner. Starting in fully automatic mode will still net you some great looking video, and you'll be able to take more control and move into manual mode over time.
We use the Canon T5i, and I find that it performs just as well for video as the more senior cameras in Canon's line.
Lens
Chances are your DSLR will come with a kit lens that will work pretty well for beginner purposes. If you want to kick your video up a notch, consider a 50mm lens. These tend to still be affordable, but they also have a better build and will allow you to achieve a wider aperture and shallower depth of field (we'll cover why that's important a little later).
Microphone
One downfall of a DSLR is the sound quality, because the built-in microphones are often low in quality. And if you're thinking about skimping on audio, think again: Studies show that although audiences will tolerate video quality issues, they aren't nearly as forgiving of bad audio.
A plug-in, on-camera mic is all you need to solve this problem, though. I like Rode mics for their ease of use and affordability. If you're looking for a more shoestring budget option, fairly high-quality audio can be recorded on your smartphone, with an app like iTalk, and then synced to your video in post-production.
Lights
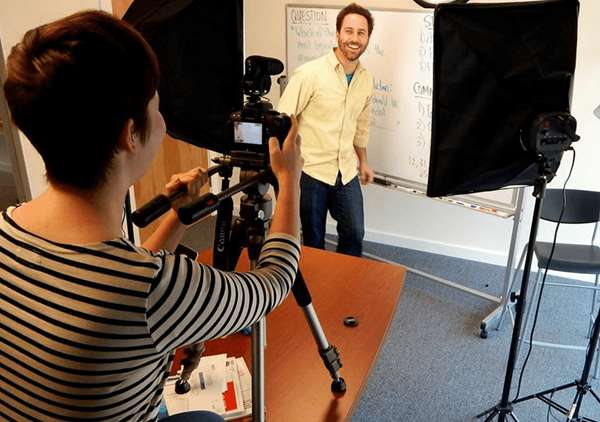
Softbox lights set up in a two-point lighting configuration are the simplest and most convenient option for face-to-camera video. There are many budget-friendly softbox lighting kits available, and using actual lights (rather than sunlight) means that you have the flexibility to film on overcast days, in rooms without windows, or after the sun has set.
In a pinch, natural sunlight can work if you position your subject facing a window in the morning or late afternoon. However, avoid overhead fluorescent lights at all costs.
Background/Set
It's easy to overlook the background behind the speaker in your video, but to do so is to miss an opportunity to create visual interest and to signal quality. There are two good ways to go here: find a clean, aesthetically pleasing room that helps convey the message of your video, or hang a neutral backdrop. We typically use a backdrop printed with our logo, since we don't have a room to consistently film in that meets those requirements.

A look at our two-point lighting setup in action!
Step 2: Learn your video basics
Depth of Field
Depth of field refers to the range of what is in focus in video, film, and photography. It's the slice of space where the image is in sharp focus; everything outside this range is soft and unfocused. Using depth of field intentionally is one of the best ways to deliver great looking video.
Here are four magic words: "shallow depth of field."
Use a shallow depth of field by setting a small aperture value, place your video subject in the range, and then let rest of the background fall into softer focus. Doing so literally places the focus on your subject, clueing in your audience into what is most important in your video.
It also gives a cinematic quality to your footage, rather than the flatter look of a home video. Without realizing it, audiences tend to understand this "film look" as indicating quality, which is a win for you.
Composition
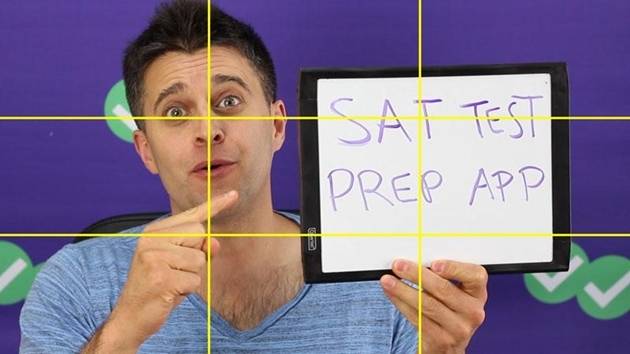
Your composition will vary depending on what you're including in your video, but for face-to-camera videos, the rule of thirds is a good concept to start with: Imagine a grid dividing your image into nine equal parts. Your subject should typically be placed on one of the vertical lines, with his or her eyes more or less lined up to the upper horizontal line.
The audience's eyes are naturally drawn to the places where the grid lines intersect, so they are a great place for you to put the things you most want them to look at.

Pulling Focus
Although camera auto modes can give you a boost as you learn to make video, one area where you should use manual is when focusing your image. Your lens's autofocus can be noisy enough to be picked up by microphones and it can "chase" your subject in a shot.
Set your focus to manual and practice pulling clear focus using the focal ring on your lens. As long as your subject stays put, you should have to get focus only once when you set up your shot.
Step 3: Iterate
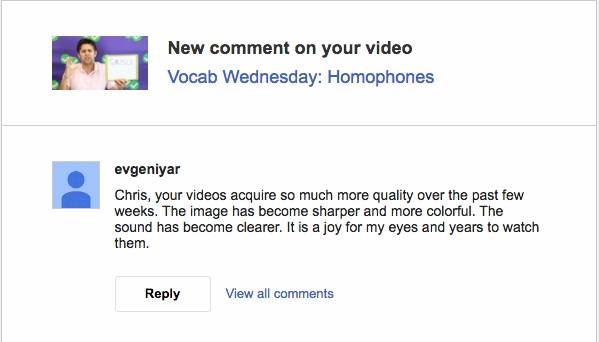
In the end, the most important thing is this: Just make a video. It's likely that everything will not be perfect the first time (or the 15th). Instead of being stymied by perfectionism, get as many of the basics down as you can and then practice one new skill each time you make a video. The Magoosh GRE YouTube channel has grown significantly over the last few years, to over 7 million views and 38,000 subscribers, but it had humble webcam-filmed beginnings. Our viewers were rooting for us as our quality improved, and yours will too!


